I had a bunch of citrus leftover from my Vanilla Bean Blood Orange Marmalade, so I figured if I want to be a serious canner, I need to get adventerous and try adding different flavors to good canning recipes!
Ingredients:
4 medium juice oranges (I used Florida navels)
2 lemons
1/8 teaspoon baking soda
4 sprigs of fresh rosemary
One 1.75-ounce package powdered pectin
6 1/2 cups granulated sugar (I used 6 cups)
1. Place your jars in the dishwasher to sterilize. From this recipe I got 72 oz (I would plan for 80 oz), it is better to have extra hot jars than not enough. You want them to be hot, so I do a hot wash, or at a minimum a normal wash with a heated dry. If you do not have a dishwasher, there are a lot of steps on line how to sterilize your jars.
2. Remove any stickers from the fruit, wash the oranges and lemons. Remove the rinds in quarters and thinly slice them lengthwise. When all the rinds are sliced, roughly chop them crosswise into slightly smaller pieces. Put the rinds in a large pot and add 2 1/2 cups of water and then the baking soda.
3. Place two sprigs of fresh rosemary in the pot and bring to a boil. Reduce the heat, cover, and simmer for 15 minutes.
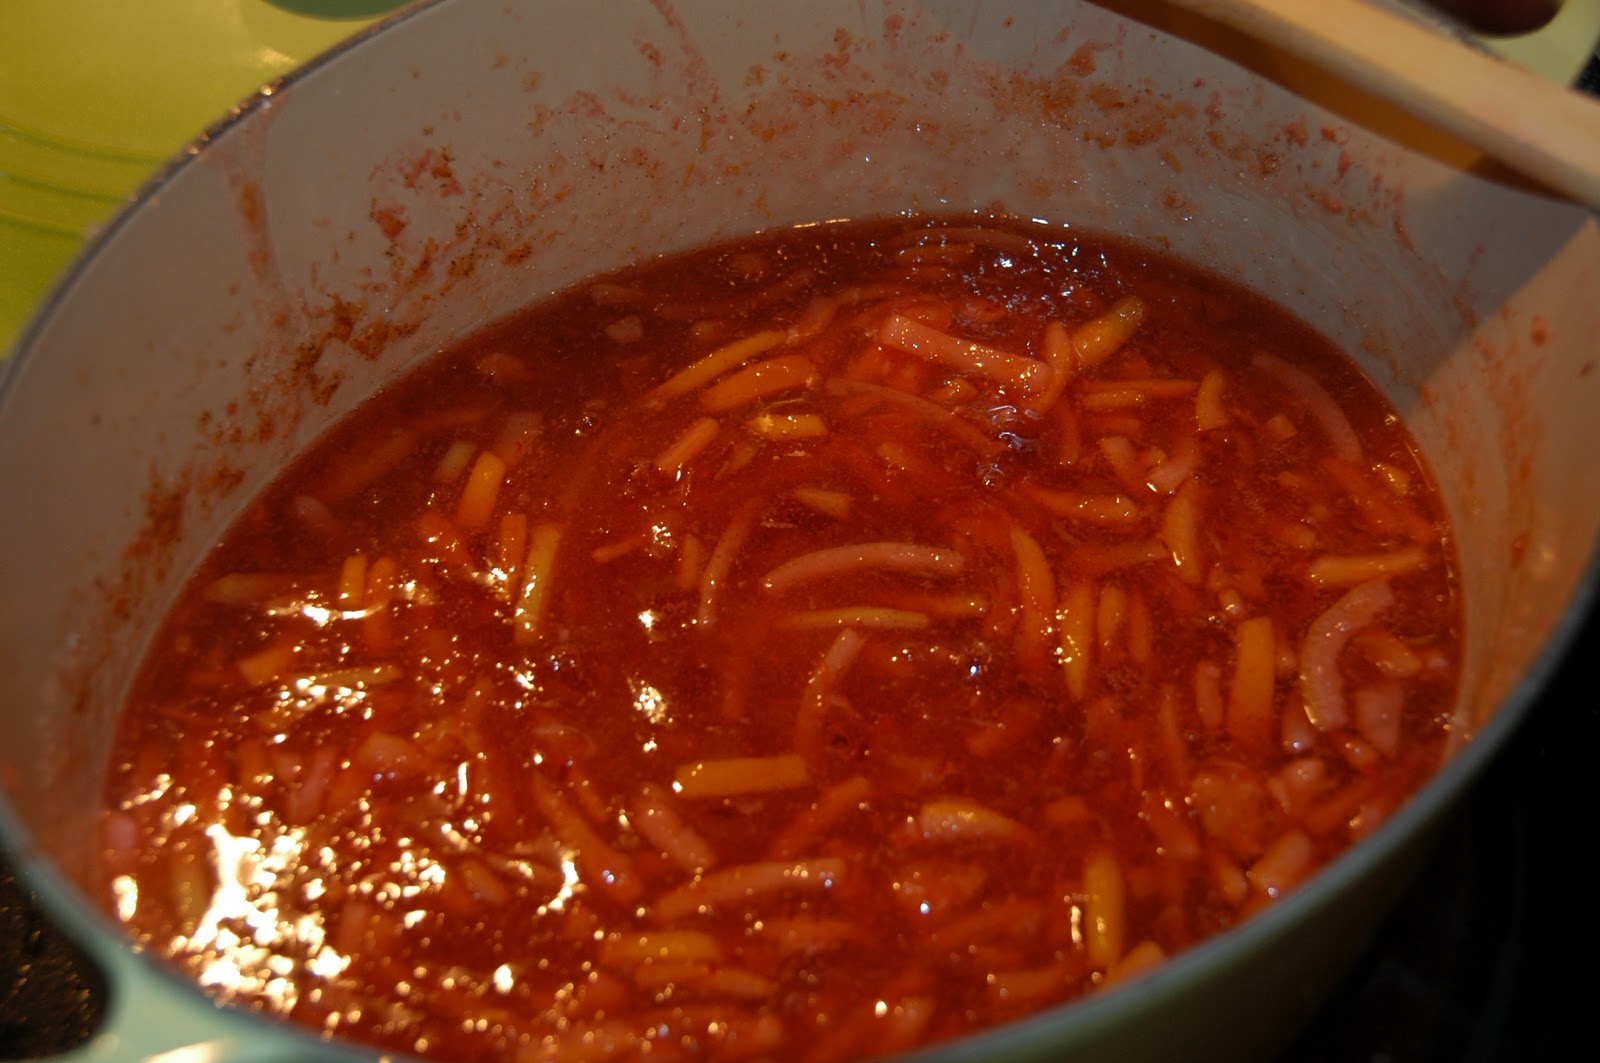
4. Meanwhile, roughly chop the oranges and lemons removing the seeds as you go. Transfer the fruit to a food processor and pulse until it is evenly chopped but still a bit coarse. (I used a blender with the chop function as my food processor does not handle liquids so good) Add the fruit to the pot with the rinds and return to a boil. Cover and boil for 15 minutes.
5. Measure out 4/12 cups of the fruit mixture. Make sure to get a good mixture of rind, fruit and juice. Discard remaining fruit mixture (I did not have any fruit mixutre remaining, I got about 4 cups similar to the blood orange marmalade so I just lowered the sugar a bit again and kept the pectin the same.
6. Return the 4/12 cups of the fruit mixture to the pot. The rosemary leaves had fallen off so I just removed the woody stem. Stir in the pectin and return to a boil. Boil vigorously for one minute with the pectin
7. Add the sugar all at once and stir until combined. Return to a rapid boil, stirring frequently, and boil hard for one minute.
8. Ladle hot marmalade into hot sterilized jars, leaving 1/4-inch headspace. Wipe rims of jars, cover with lids, and screw bands on until just barely tight. Place jars on rack in pot and cover completely with water. Cover pot and bring to a boil over high heat. Boil for 10 minutes. Turn off heat, uncover pot, and allow jars to rest in water for five minutes. Remove jars from pot and allow to rest undisturbed on counter top for six hours or overnight. (Now I did not cover my pot, as it was to noisy. I did place in already boiling water)
This recipe is not as sweet as the blood orange but it is still delicious. It was so good on a bagel with cream cheese and a nice cup of tea!!
Taking a little trip through the road of life. Seeing what is beautiful in it and makes me happy. I hope you like what I share.
Showing posts with label Canning. Show all posts
Tuesday, February 1, 2011
Monday, January 31, 2011
Brie Phyllo Appetizer
This weekend was fun filled with dinner Friday night at Fayette Street Grill with the G's
http://www.fayettestreetgrille.com/
I loved my appetizer...Brie and Pear Quesadilla over Greens with Raspberry Habanero Sauce..now how could someone not love that...I left wondering how did they get the quesadilla so crunchy on the outside!! It seemed different than a Mexican quesadilla, this was golden brown and crunchy!
Saturday was Mr. P's annual Winter-een-mas, which is short for Video Game day! He unfortunately did not get crowned king this year, but he had a great time. I love hearing the stories of the day when he get's home. Each guy brings there own xbox and monitor, and they all play around the table against each other!!! Sounds like a gamers dream.
I stayed at home in the morning, and cleaned up the tile project in the master bathroom. And than headed to my parent's house to have lunch and make the Valentine's Day craft sample. I have to say it looks AMAZING..I am in love! I am so excited to show all of you. The big unveiling will be this week..
Than later that night it was a Girl's Night out Party, my friend had a spray tan company there, a spa company, and she had her Stella and Dot out! I love the Jewelry!
Now, I am not to keen on putting different products on my body, so I just tried the foot cream. You place it on your foot, and than cover your foot with a new plastic bag, and put socks over it. Wow the one cream really heated up. It kind of reminded me of the cream, I used to buy from Bath and Body works that they discontinued.
Yesterday, was a clean up day. In my opinion, I feel that my home has been influx since we got married. We lived in an apartment at first that could only fit so much, than we moved into our house, and immediately decided to fix up the master bathroom/bedroom, well three years later, we are not done, but getting very close to the end!
I am getting ready and anxious everyday to move in to my house! This means I got to sit in front of my below fireplace and go through box after box, from room after room!
YAY!!! My dad and his building manager Mr. P have worked so hard, I love it :)
Well on to the recipe!!
After the quesadilla I was really craving brie, I was thinking of making a brie savory cheese cake, but I did not have enough time, so I figured let me try something simple, and get to use some of my marmalade.
Ingredients
1 Small wheel of brie
4 Gingersnap Cookies
Jam/Jelly/Marmalade of your choice
2 Packages of the Phyllo Dough Cups (They seem to sell 15 in a box)
1. Pre-heat your oven to 350 degrees.
2. You want to remove the rind off of the brie, I used a vegetable peeler, it worked out great, and I saved the rind for scrambled eggs the next morning
4. Place a 1/4 tsp of the crushed Gingersnap in the bottom of each phyllo cup, and enough brie to cover up the gingersnap. You will have to cut the brie into little pieces. From the below photos, you can still see some Gingersnap, however you would want to place more brie in your cups than I did!
6. Pull out of the oven, and place 1/4 tsp of your favorite jam/jelly/marmalade, I used my homemade Vanilla Bean Blood Orange Marmalade. Place this in the oven until until the marmalade melts, about another 3 minutes.
7. Cool on wire racks, now I placed caramelized pecans on top, but I think this takes away from the recipe, on the second set of 15 I did not put the pecans on top.
8. However you do need to sprinkle a pinch of sea salt on top this melded all of the tastes together!
http://www.fayettestreetgrille.com/
I loved my appetizer...Brie and Pear Quesadilla over Greens with Raspberry Habanero Sauce..now how could someone not love that...I left wondering how did they get the quesadilla so crunchy on the outside!! It seemed different than a Mexican quesadilla, this was golden brown and crunchy!
Saturday was Mr. P's annual Winter-een-mas, which is short for Video Game day! He unfortunately did not get crowned king this year, but he had a great time. I love hearing the stories of the day when he get's home. Each guy brings there own xbox and monitor, and they all play around the table against each other!!! Sounds like a gamers dream.
I stayed at home in the morning, and cleaned up the tile project in the master bathroom. And than headed to my parent's house to have lunch and make the Valentine's Day craft sample. I have to say it looks AMAZING..I am in love! I am so excited to show all of you. The big unveiling will be this week..
Than later that night it was a Girl's Night out Party, my friend had a spray tan company there, a spa company, and she had her Stella and Dot out! I love the Jewelry!
Now, I am not to keen on putting different products on my body, so I just tried the foot cream. You place it on your foot, and than cover your foot with a new plastic bag, and put socks over it. Wow the one cream really heated up. It kind of reminded me of the cream, I used to buy from Bath and Body works that they discontinued.
Yesterday, was a clean up day. In my opinion, I feel that my home has been influx since we got married. We lived in an apartment at first that could only fit so much, than we moved into our house, and immediately decided to fix up the master bathroom/bedroom, well three years later, we are not done, but getting very close to the end!
I am getting ready and anxious everyday to move in to my house! This means I got to sit in front of my below fireplace and go through box after box, from room after room!
YAY!!! My dad and his building manager Mr. P have worked so hard, I love it :)
Well on to the recipe!!
After the quesadilla I was really craving brie, I was thinking of making a brie savory cheese cake, but I did not have enough time, so I figured let me try something simple, and get to use some of my marmalade.
Ingredients
1 Small wheel of brie
4 Gingersnap Cookies
Jam/Jelly/Marmalade of your choice
2 Packages of the Phyllo Dough Cups (They seem to sell 15 in a box)
1. Pre-heat your oven to 350 degrees.
2. You want to remove the rind off of the brie, I used a vegetable peeler, it worked out great, and I saved the rind for scrambled eggs the next morning
3. Crush the Gingersnap cookies 1 at a time, I used a Pillon which is Puerto Rican for a Mortar and Pistol.
4. Place a 1/4 tsp of the crushed Gingersnap in the bottom of each phyllo cup, and enough brie to cover up the gingersnap. You will have to cut the brie into little pieces. From the below photos, you can still see some Gingersnap, however you would want to place more brie in your cups than I did!
5. Place in the pre-heated over for 10 minutes, or until the brie melts.
6. Pull out of the oven, and place 1/4 tsp of your favorite jam/jelly/marmalade, I used my homemade Vanilla Bean Blood Orange Marmalade. Place this in the oven until until the marmalade melts, about another 3 minutes.
7. Cool on wire racks, now I placed caramelized pecans on top, but I think this takes away from the recipe, on the second set of 15 I did not put the pecans on top.
8. However you do need to sprinkle a pinch of sea salt on top this melded all of the tastes together!
The finished Product cooling!!
Tuesday, January 11, 2011
Vanilla Bean Blood Orange Marmalade
First off I need to say Thank you to Cindy at: Canning Year Two!: http://sbcanning.blogspot.com/
Ingredients:
2 medium juice oranges (I used Florida navels)
2 large blood oranges (I used 1 1/2 large and 1 small)
2 lemons
1/8 teaspoon baking soda
1 vanilla bean
One 1.75-ounce package powdered pectin
6 1/2 cups granulated sugar (I used 6 cups)
1. Place your jars in the dishwasher to sterilize. I would plan for 75 oz, it is better to have extra hot jars than not enough. You want them to be hot, so do a hot wash, or at a minimum to a heated dry. If you do not have a dishwasher, there are a lot of steps on line how to sterilize your jars.
1. Remove any stickers from the fruit, wash the oranges and lemons. Remove the rinds in quarters and thinly slice them lengthwise. When all the rinds are sliced, roughly chop them crosswise into slightly smaller pieces. Put the rinds in a large pot and add 2 1/2 cups of water and then the baking soda.
I reached out for recipe ideas for making Blood Orange Marmalade, and she was more than helpful she provided a recipe, and than when I had questions, even provided photos explaining the process.
Cindy is a member of the SB Canning Group, and blogs about here canning adventures to meet her ultimate goal to become a more sustainable household!
I have been learning about blood oranges for a while now, I believe the first time was Oprah's favorite things involving a blood orange sorbet!! After last night, now I know why.
This marmalade is amazing, I even forced Mr. P to try it, and he was surprised how good it was!
Now this is not a cheap recipe to make, after three stores..I found blood oranges that were marmalade worthy. However when I started to make the recipe, the smaller, cheaper oranges were more red!
2 medium juice oranges (I used Florida navels)
2 large blood oranges (I used 1 1/2 large and 1 small)
2 lemons
1/8 teaspoon baking soda
1 vanilla bean
One 1.75-ounce package powdered pectin
6 1/2 cups granulated sugar (I used 6 cups)
1. Place your jars in the dishwasher to sterilize. I would plan for 75 oz, it is better to have extra hot jars than not enough. You want them to be hot, so do a hot wash, or at a minimum to a heated dry. If you do not have a dishwasher, there are a lot of steps on line how to sterilize your jars.
1. Remove any stickers from the fruit, wash the oranges and lemons. Remove the rinds in quarters and thinly slice them lengthwise. When all the rinds are sliced, roughly chop them crosswise into slightly smaller pieces. Put the rinds in a large pot and add 2 1/2 cups of water and then the baking soda.
For some reason, I could not understand this. And I still had some trouble figuring out how to get the citrus off the peel, I first tried using a knife and cutting it off, but I could from Cindy's photos that is not what she did. Mr P. was taking photos for me, and advised you just peel it off. I am a novice cooking with citrus!!
2. With a sharp knife, split the vanilla bean open lengthwise and scrape the seeds into the pot. Add the vanilla bean to the pot and bring to a boil. Reduce the heat, cover, and simmer for 15 minutes.
3. Meanwhile, roughly chop the oranges and lemons removing the seeds as you go. Transfer the fruit to a food process and pulse until it is evenly chopped but still a bit coarse. (I used a blender with the chop function as my food processor does not handle liquids so good) Add the fruit to the pot with the rinds and return to a boil. Cover and boil for 15 minutes.
| Dicing before they are placed in the mixer |
4. Measure out 4/12 cups of the fruit mixture. Make sure to get a good mixture of rind, fruit and juice. Discard remaining fruit mixture and vanilla bean (I only got 4 cups of fruit mixture so I lowered my sugar a bit, and used the same amount of pectin, I just figured it will be a harder set)
5. Return the 4/12 cups of the fruit mixture to the pot. Stir in the pectin and return to a boil. Boil vigorously for one minute
| With the pectin |
6. Add the sugar all at once and stir until combined. Return to a rapid boil, stirring frequently, and boil hard for one minute.
7. Ladle hot marmalade into hot sterilized jars, leaving 1/4-inch headspace. Wipe rims of jars, cover with lids, and screw bands on until just barely tight. Place jars on rack in pot and cover completely with water. Cover pot and bring to a boil over high heat. Boil for 10 minutes. Turn off heat, uncover pot, and allow jars to rest in water for five minutes. Remove jars from pot and allow to rest undisturbed on counter top for six hours or overnight. (Now I did not cover my pot, as it was to noisy. I did place in already boiling water)
From this I have a couple of questions I need to figure out:
1. The difference between liquid pectin and powdered pectin
I did learn that the baking soda is what neutralized the bitter taste from the pith! Thank you Again Cindy!!
| boiling with the Vanilla bean! |
| What not to do, peel and don't slice the fruit off! |
![]() |
| The peels chopped |
Monday, November 15, 2010
Apple Butter
This summer I did a good amount of canning, and I think I just assumed that canning is only for the summer months. But I think I was wrong, there are apples in the fall, and citrus in the winter months. This is my second time making this simple, easy apple butter.
1. Cut 10 to 12 apples into slices, I used various types of apples, that Mr. P and I had picked. (you leave the peel on, just remove the seeds, and any part of the hard core.
2. Place in a crock pot on low for a day, I did about 26 hours.
3. You also need to add in 1 cup of apple cider, 1 cup of brown sugar, 1/2 tsp. of nutmeg, 1/2 tsp. of pumpkin pie spice, and 1 cinnamon stick.
Initially it looked like this. The apples are a little brown, as they were sitting for a couple of hours not on; the outlet was out, and I did not realize. (This actually has not happened before with an outlet being out)
After about 5 hours:
They are really starting to sweat, and break down. Every time I go into the kitchen, i just give the pot a good stir. I did this about 4 times total.
4. I cooked the apple mixture for about 15 hours with the lid on, and than tilted the lid, for the remaining time.
5. Once it is done cooking, it will look like this:
6. Take out the cinnamon stick, and than use your immersion blender to mix up apple butter.
7. Place the jars, lids, and bands in your dishwasher.
8. While the jars are getting clean and sterilized in your dishwasher, put a large pot of water on the stove.
9. Fill the jars up, and make sure you wipe off any spillage on the rim and sides, place the seal on the jar, and tightly place the band around the jar.
10. Place in the boiling pot for 15 minutes to seal.
11. After 15 minutes, remove the jars carefully from the boiling water, and place on a towel and wait for the seals to pop.
Now you are all done, try to find some unique recipes in which to use for the apple butter.
I only got three jars from the crock pot recipe.
The first time I made the butter, I used this recipe exactly:
http://coconutlime.blogspot.com/search/label/apple
I have decided to slightly adapt this time, as I had various types of apples, and wanted to try pumpkin pie spice !! ENJOY!!!!
1. Cut 10 to 12 apples into slices, I used various types of apples, that Mr. P and I had picked. (you leave the peel on, just remove the seeds, and any part of the hard core.
2. Place in a crock pot on low for a day, I did about 26 hours.
3. You also need to add in 1 cup of apple cider, 1 cup of brown sugar, 1/2 tsp. of nutmeg, 1/2 tsp. of pumpkin pie spice, and 1 cinnamon stick.
Initially it looked like this. The apples are a little brown, as they were sitting for a couple of hours not on; the outlet was out, and I did not realize. (This actually has not happened before with an outlet being out)
After about 5 hours:
They are really starting to sweat, and break down. Every time I go into the kitchen, i just give the pot a good stir. I did this about 4 times total.
5. Once it is done cooking, it will look like this:
6. Take out the cinnamon stick, and than use your immersion blender to mix up apple butter.
7. Place the jars, lids, and bands in your dishwasher.
8. While the jars are getting clean and sterilized in your dishwasher, put a large pot of water on the stove.
9. Fill the jars up, and make sure you wipe off any spillage on the rim and sides, place the seal on the jar, and tightly place the band around the jar.
10. Place in the boiling pot for 15 minutes to seal.
11. After 15 minutes, remove the jars carefully from the boiling water, and place on a towel and wait for the seals to pop.
Now you are all done, try to find some unique recipes in which to use for the apple butter.
I only got three jars from the crock pot recipe.
The first time I made the butter, I used this recipe exactly:
http://coconutlime.blogspot.com/search/label/apple
I have decided to slightly adapt this time, as I had various types of apples, and wanted to try pumpkin pie spice !! ENJOY!!!!
Friday, August 6, 2010
Making Jelly with a big check
I have been wanting to try canning for some time. When I was younger I would make Jam with my Dad: Strawberry, Blueberry, and Peach. I must of enjoyed it, because I have been wanting to make some Jam for a while.
While I did not make Jam..I made something just as great: Cranberry Jalapeno Jelly.
The recipe was very easy to follow, and was very exact which helps when you are tackling something you are not so comfortable with.
1. Place the jars, and bands in the dishwasher. (everything I have read says not to place the lids in the dishwasher..I did). I used the small 4 oz jelly jars, as they make nice gifts, and I am not fast on going through jelly, this way I figured I would always have fresh jelly in my near future.
2. Start the big pot of water, that you are going to be boiling the jars in. I also did not have any fancy big pots, another reason why I used the 4 oz jars. I knew they would fit in my standard pot at home.
3. The jalapeno's were not bad to deal with. What I did was I cut the head off (stem) and than cut around the seeds. If any seeds or ribs were left in the pepper after this, I just rinsed it under water. I have to say I felt no burning of the eyes, but I was very careful, and always washed my hands when I was done cutting all of the peppers.
4. As the peppers did not need to be minced, I just through them in the blender with cranberry juice, the next step was easy.
5. Now the straining part, I feel that I was very creative. I jused skewers to hold the cheese cloth in place, and was careful not to pour to fast, that the mixture would not be able to properly go through the cheese cloth.
11. This is the goop that came off..not to appealing..so I am glad I spent so much time skimming. What I did was I used a wooden spoon, and kept bringing the nasty goop to the side, than dumped it into a bowl. I did need to wash my spoon off half way as the goop was hardening on to the spoon, and I felt hurting me reaching my full potentional of a beautifully skimmed pot.
12. So this is what I got.
An almost perfectly skimmed pot
13. Next you need to fill the jars, once you place the jelly in, wipe the side and the top where the lid will go very clean. I used a warm paper towel...
14. Place the lid on the center, than I placed the band on the top, pushed down a little and started to screw the cap on. This is not as easy as it sounds as the jars are hot, and the jelly is hot. You need to be careful, I used a pot holder, this helped a lot.
15. Once I had six done, I placed them in the hot water bath, for the time prescribed in the recipe. I used tongs (and not canning tongs) to place them in the water. And the same tongs, to place the hot jars on a beach towel to dry, pop, and be perfectly sealed.
16. The sounds of those little pops were so nice. I have to say for me most of them happend in the first 5 minutes, which was exciting, and those little pops were each an encouragement to try another type of jelly.
17. I repeated the above of taking a jar out of the dish washer, closing the dish washer quickly for the hot air to not escape, filling the jars, wiping the jars, placing the lid, screwing the band, for 18 times. I did a total of 3 water baths.
18. Overall this recipe was great, I had a good time, and made that big check off my summer to do list.
The recipe came from someone at Taste of Home..
http://www.tasteofhome.com/recipes/Jalapeno-Cranberry-Jelly
I have to say I felt quite accomplished once I tackled this jelly, and it helps that it tastes delicious.
While I did not make Jam..I made something just as great: Cranberry Jalapeno Jelly.
The recipe was very easy to follow, and was very exact which helps when you are tackling something you are not so comfortable with.
1. Place the jars, and bands in the dishwasher. (everything I have read says not to place the lids in the dishwasher..I did). I used the small 4 oz jelly jars, as they make nice gifts, and I am not fast on going through jelly, this way I figured I would always have fresh jelly in my near future.
2. Start the big pot of water, that you are going to be boiling the jars in. I also did not have any fancy big pots, another reason why I used the 4 oz jars. I knew they would fit in my standard pot at home.
3. The jalapeno's were not bad to deal with. What I did was I cut the head off (stem) and than cut around the seeds. If any seeds or ribs were left in the pepper after this, I just rinsed it under water. I have to say I felt no burning of the eyes, but I was very careful, and always washed my hands when I was done cutting all of the peppers.
4. As the peppers did not need to be minced, I just through them in the blender with cranberry juice, the next step was easy.
5. Now the straining part, I feel that I was very creative. I jused skewers to hold the cheese cloth in place, and was careful not to pour to fast, that the mixture would not be able to properly go through the cheese cloth.
6. Now you pour the mixture you strained into a lovely pot (I used the word lovely as this describes my Le Creuset Pot) Add the vinegar, stir in the sugar. Now I have a glass stove stop, so I was careful not to get sugar on the top. I know it will ruin the top, but not exactly sure how or why...I just have been warned by Mr. P.
7. I just kept stirring the above, and stirring, I did not want any problems with this jelly. I wanted perfection!
8. Next you add the pectin, and you are almost done.
9. Good thing for me, my jars were nice and hot in the dry cycle in the dish washer, and my pot of water was boiling nicely. (I did have to keep adding water to the pot while I was making the jelly to keep the water level up)
10. What I did not realize that this skimming thing was so tough. Well not tough, just time consuming. Below is what I had to tackle. I was trying for perfection so the skimming took me about 10 minutes.
11. This is the goop that came off..not to appealing..so I am glad I spent so much time skimming. What I did was I used a wooden spoon, and kept bringing the nasty goop to the side, than dumped it into a bowl. I did need to wash my spoon off half way as the goop was hardening on to the spoon, and I felt hurting me reaching my full potentional of a beautifully skimmed pot.
12. So this is what I got.
An almost perfectly skimmed pot
13. Next you need to fill the jars, once you place the jelly in, wipe the side and the top where the lid will go very clean. I used a warm paper towel...
14. Place the lid on the center, than I placed the band on the top, pushed down a little and started to screw the cap on. This is not as easy as it sounds as the jars are hot, and the jelly is hot. You need to be careful, I used a pot holder, this helped a lot.
15. Once I had six done, I placed them in the hot water bath, for the time prescribed in the recipe. I used tongs (and not canning tongs) to place them in the water. And the same tongs, to place the hot jars on a beach towel to dry, pop, and be perfectly sealed.
16. The sounds of those little pops were so nice. I have to say for me most of them happend in the first 5 minutes, which was exciting, and those little pops were each an encouragement to try another type of jelly.
17. I repeated the above of taking a jar out of the dish washer, closing the dish washer quickly for the hot air to not escape, filling the jars, wiping the jars, placing the lid, screwing the band, for 18 times. I did a total of 3 water baths.
18. Overall this recipe was great, I had a good time, and made that big check off my summer to do list.
http://www.tasteofhome.com/recipes/Jalapeno-Cranberry-Jelly
I have to say I felt quite accomplished once I tackled this jelly, and it helps that it tastes delicious.
Subscribe to:
Posts (Atom)


